Sunday 30 October 2011

Vanilla & Passionfruit Whoopies

Well, this is my first try of a recipe out of my new cookbook from my secret pal -
Vanilla & Passionfruit Whoopies...


Ingredients:
- 125g unsalted butter, just softened
- 165g caster sugar
- 1 egg, at room temperature
- 1 tsp vanilla essence
- 300g plain flour
- 1 tsp baking powder
- 1/2 tsp bicarbonate of soda
- 150ml milk
- 1 quantity vanilla butter cream with fresh passionfruit pulp


1. Preheat oven to 180 degrees. Line 3 baking trays with baking paper.

2. Use an electric mixer to beat the butter and sugar in a medium bowl, until pale and creamy.

3. Sift the flour, baking powder and bicarbonate of soda together. With the mixer on low speed, add flour mixture and milk alternately in two separate batches each. Beat on low speed for 2 minutes.

4. Spoon even, heaped tablespoons of mixture onto trays, leaving 5cm for spreading. Bake for 12 minutes, swapping trays around at 8 minutes.

5. When cooled, spread vanilla butter cream on one half and sandwich together


Recipe taken from 'Make Me Whoopies'

Saturday 22 October 2011

Christmas Dove Ornament


As I have mentioned before, we are holding a secret pal at my workplace, so I have been taking up the opportunity to make a few things to give my secret pal. Last week I made some 'Glace' Cherry Bites' and packaged them in a coffee cup. This week I wanted to make something a little Christmasy. This cute Christmas Dove Ornament is featured in this months issue of 'Better Homes & Gardens Magazine' and was very fun to make. I hope she likes it!


Thursday 20 October 2011

I got a present!


Well, 'secret pal' at our work place has begun. It is basically a lead up to 'Kris Kringle' 
where we give secret gifts to our workmates. 


My secret pal definitely knows me and gave me this gorgeous book all about whoopies.  
I can't wait to try some of the recipes. Thank you secret pal.


Thursday 13 October 2011

Date & Pistachio Slices

Well, its the first week back at school, and I wanted to make a treat for my teaching buddies. I had a packet of pistachios which I wanted to get out of my house, as they are very munchable.

Ingredients:
Filling
- 250g pitted dates, chopped
- 80g pistachio nuts, chopped
- 1 tbsp honey
- 2 tbsp lemon juice
- 2 tbsp water

             Pastry
              - 225g plain flour, sifted
              - 25g golden caster sugar
              - 150g butter
              - 4-5 tbsp cold water to mix
              - Milk for glazing


1. Place the dates, lemon juice and water in a pan and bring to the boil, stirring. Remove from the heat.

2. Stir in the pistachio nuts and 1tbsp honey, cover and leave to cool.

3. Preheat the oven to 200 degrees. For the pastry, place the flour, sugar and butter in a food processor and process until the mixture resembles fine bread crumbs.

4. Mix in just enough cold water to bind to a soft, not sticky dough.

5. Roll out the pastry on a floured surface to two 30 x20cm rectangles. Place one on a baking sheet.

6. Spread the date & nut mixture to within 1cm of the edge. Top with the remaining pastry.

7. Press to seal, trim the edges and mark into 12 slices. Glaze with milk.

8. Bake for 20 - 25min, until golden (in my oven it took around 30-35min). Brush with remaining honey and cool on a wire rack. I then sprinkled it with some sugar.

7. Cut into slices and serve.


Recipe taken from 'Frame-to-Frame Baking' by Love Food

Friday 7 October 2011

Choc-Caramel Ravioli

Every Wednesday we meet together with our small groups, and every now and then we share a meal together. When we were deciding who was going to bring what, well naturally I put my hand up for desert.

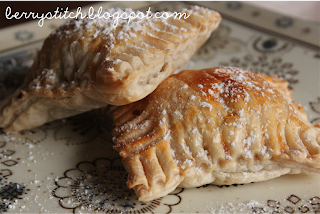
I found these delectable, bite-size deserts on taste.com, and have never used puff pastry before (I know, it's amazing) so I thought I would give them a go.


Ingredients:
- A sheet of frozen ready-rolled puff pastry, partially thawed.
- 60g Snickers, chocolate bar, cut into slices.
(I used a double pack)
- Icing sugar mixture for dusting


1. Preheat oven to 200degrees and line a baking tray with baking paper.

2. Cut pastry into 4 equal strips. Cut each strip into 4 equal squares. Place 1 piece of snickers on 1 pastry square. Top with another pastry square and using a fork, press edges together to seal. Repeat with remaining pastry and place on prepared tray.


3. Bake for 10 - 12min or until golden brown and puffed. Set aside for 3 minuets for filling to cool. Dust with icing and serve.

Thursday 6 October 2011

A bag for Katie


Along with the singlets for Isabel, I wanted to send my sister a little goodie bag to put in her baby bag. Instead of buying one, I thought that I would make a bag. 

This is the first bag I have made in a very, very long time. 


Below are some photos of the finished product as well as some of the process.

Now that it is finished, I plan to fill it with a few things that maybe useful to have.
- bobby pins
- lip gloss
- paw paw oint
- tissues
- a nail file
- hair ties
-a pen
- a mirror


Muesli Biscuits with drizzled Dark Chocolate


I was looking for a healthy biscuit to make - and then I found these on Taste.com. They are not so healthy, but a quite addictive.


Ingredients:
- 3 cups natural muesli
- 1 cup sultanas
- 1/2 cup slivered almonds
- 3/4 cup plain flour
- 100g butter, melted, cooled
- 1/2 cup maple syrup
- 1 egg, lightly beaten
- 1/2 cup dark chocolate melts


1. Preheat oven to 180 degrees. Grease 2 large baking trays and line with baking paper.

2. Combine muesli, sultanas and almonds in a large bowl. Sift flour over muesli mixture and make a well in the centre.

3. Combine butter, syrup and egg in a jug. Pour into well and stir to combine.

4. Using 2 tablespoons of muesli mixture at a time, shape into balls. Place balls on prepared trays and flatten slightly.

5. Bake for 20min or until golden. Allow to cool on trays.

6. Meanwhile, place chocolate in a heatproof, microwave-safe bowl and microwave on high for 30 sec. Stir chocolate and repeat until smooth and runny. Using a spoon, drizzle chocolate over biscuits.


Sunday 2 October 2011

Isabel's Singlets


On the 20th September 2011, My beautiful sister gave birth to a beautiful baby girl, Isabel Grace. I had been waiting to find out the sex of the baby before I created something for her, and had the idea of these singlets in my head for a while. I had planned to make them for some of the other little people in my life, but thought who better to make the first ones for, but my first niece...


I bought a five pack of 000 pink, white and grey singlets (as she was a tiny 5pound 11ounces when she was born, so hopefully they are the right size for summer) and visited my local Lincraft for some floral quilting material. I also pulled out a few off cuts I had from some quilts I had made. After washing everything, I took the opportunity of a labour day long weekend and got started.


I had the two flower designs planned for a while and after looking at a friends blog
(http://alittleredribbon.blogspot.com/2010/09/little-butterfly-shirt-tutorial.html) decided to do a butterfly version as well. The first thing I wanted to do was get everything ready, ironed, so once I got going, I wouldn't have to stop.


I started by drawing the shapes that I wanted, onto an iron adhesive and ironed each onto a piece of material, cutting it out ready to iron onto the singlets.


I then positioned each one and ironed them into place. I had decided that I wanted to put little sleeves on each one and had originally planned on doing them both the same, using a chiffon material, but found some lovely lace while shopping and changed one of them to have a lace trim. I pinned the lace and chiffon into place and ironed each one, to try and keep it neat for sewing. After the sleeves/trim and flowers were sewn on, I sewed some buttons in the centre of each flower to finish. I put some tiny wings on the back of the butterfly singlet. I just used some chiffon and tied a bright pink ribbon on it to bunch, and then sewed it onto the back.


Below are the finished singlets. I made three in total. They were so fun to make, that I am already starting the ones I originally planned for Christmas, as well as a boy version for my nephews birthday.