Saturday, 4 February 2012

Ruffle Camera Strap

Another project finished!!! After researching a few different designs, I loved the ruffle one the best and here it is..
Now I have a snazzy new camera strap AND I think it's pretty cute! I cant wait to make another one, i'll just add it to my list..


Friday, 3 February 2012

Oscar the Owl

Okay, I admit I am a little obsessed with owls at the moment, so the next logical step was to sew one. I just decided to go for it and draw a pattern and see how it went. So here is my finished product. I had originally thought to make a door stop, however, it wasn't heavy enough in the end. Oh, and I forgot to mention it was a gift for my mum - she loved it!!!! AND named it Oscar... hence the name..


Wednesday, 25 January 2012

Study Revamp..

These photos are quite embarrassing, but I'm sure that everyone has a room which they dump things in, either when visitors come, or where there is nowhere else to put it... Well, I decided it was time to clean my 'dump space' and make it into a usable area, where I could keep my sewing machine permanently set up, rather than lugging it into the dining room when I wanted to use it. Check out these before and after picks..


There is still a few other little things I want to do, but I LOVE IT! I actually cant wait to work in here, a big contrast to closing the door and ignoring I had this room completely.. Plus, I have a place for one the two chairs I bought at a second hand store, which I am also planning to revamp.. keep your eyes peeled..

Friday, 13 January 2012

Quilted Babushka Cushion


I made this cushion for my beautiful niece Isabel.
I have been working on it for the last couple of months and while the journey has been both exciting and frustrating, I am happy with how it turned out.


I wanted it to be a little bit vintage, so bought a range of mis-match materials, as well as used a few I had already.


*************


I first cut half of each kind of material into random width strips, then ironed over the edges, ready to pin them together.
I had had this image in my mind of the material strips being woven in a pattern, and after pinning them together, overlapping and filling gaps, I sewed any seem that I could find.


I had cut out a 'pattern' from baking paper and pinned it to the sewed material pieces, cutting around it leaving a 1cm overhang for sewing.


The next thing I needed to do was attach the face. I found a bowl in my cupboard that was roughly the right size, traced it and then cut it out. I ironed the edge and then attached felt eyes and mouth through blanket stitch. When I was happy with it, I then sewed it onto the centre of the head. I then repeated this process and made a smaller version
(I think the face looks a bit funny on the baby babuska, but my husband insists that it is fine)


I decided to make the front piece into a cushion (without stuffing), and the back piece into a cushion (without stuffing), and then attach the both (inside out), turning in the right way and then stuffing. Zippers had always gotten the best of me, so I was unsure at the start, how I was going to seal the bottom, as it needed to open and close to remove the smaller babushka. Well.. after leaving it for a while, waiting for some inspiration, I had taught myself, through reading many others blogs, how to sew a zipper. Unfortunately, this was after I had passed the point where I should have done it for this cushion, so decided to sew some hair ties into the seam and then some buttons for them to hook over. I actually think this was a better option, and love how it turned out.


I think she liked it... The smaller doll is exactly the right size for her to hold at the moment. I am a bit biased, but isn't she just adorable.


Tuesday, 10 January 2012

Ruffle Bottom Onesie


As many of you know, I have recently welcomed a niece into my life, and after four nephews, was truly excited to make some pretty girly things.. I have only been blogging for a little while, and have only in the last month or so, been gathering some ideas from the blogs of others... like this gorgeous ruffle bottom onesie.

You can find it here - 

I had been avoiding pulling out my over locker, but decided that this was the project to do it. BUT after pulling it down, realised I have put (or carefully lost) the cord, so I had to go with the second option in this tutorial, using pinking shears.
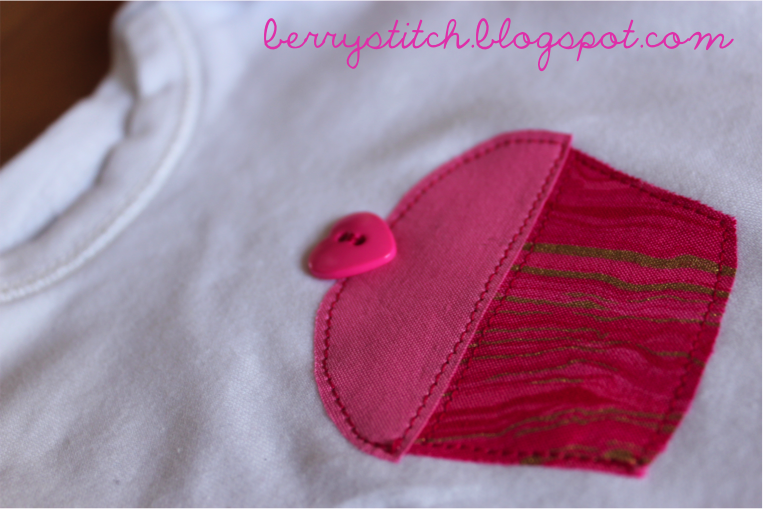
I also added a cup cake applique to the front. The next time I approach this, I will probably put the ruffles a little lower, as they seem to rest just above the bottom (as well as get my over locker going, as I think it is the better option for wear.


Below are some pictures of my finished product. It wears well, however, I am very interested to see how it survives a wash.


Monday, 26 December 2011

Christmas Day


For the first time since we have lived in our house (almost 7 years) we were able to host Christmas lunch. Unfortunately, not everyone was able to make it on Christmas day this year, so we took the chance of not having as many people as usual to squeeze into our little lounge room. I chose a white & red colour scheme and sewed a few things for the occasion. I had been inspired from a few blogs to try and make some bunting flags. After purchasing some festive red and white prints I fused strips together and used pinking shears to cut them into triangles.


It was a wonderful day! My parents, in-laws, grandparents and brothers were all able to join us. Each with their own name card, which, of course, fitted into the theme of red and white.


For those that know me, I am a little anal, so, if it wasn't red or white, or necessary for eating, it wasn't allowed... hehe.. I strung up some red baubles and a felt cut-out string from the window and the arch way. Another thing I sewed for the day was a table runner. It was plain red, and straight (nothing all that fancy) with some ribbon sewed down the sides and the end. At the side was our food table, decorated with just a few red and white things.


Thank you for a lovely day family! I love you all and I hope you enjoyed it..


The next couple of photos are just of some biscuits I made and wrapped up for my friends for Christmas.


Have a wonderful Christmas!

Friday, 23 December 2011

Mascarpone Tarts

 Every school holidays, I meet up with some of my lovely friends, old colleges, from when I worked in pharmacy. I bring them lunch, and some sort of treat. Last time I visited I took choc-musli biscuits, which, although they were delicious, after showing them some pictures from my blog, they insisted that I make something 'yummy' for the, next time.
I was flicking through some old 'Better Homes and Gardens' magazines and found these little tartlets, that seemed really easy and looked delightful.


Ingredients:
Pastry
- 1 3/4 cups plain flour
- 1/3 cup pure icing sugar
- 185g unsalted butter, chopped
- 1 egg yolk (keep the egg white for glazing)
- 1 tbsp iced water
- 1 tsp vanilla essence

Filling
- 200g mascarpone
- 1/4 cup caster sugar
- 2 tsp vanilla essence
- 1 punnet small strawberries, sliced


Method:
1. Preheat oven to 200 degrees celsius. Put flour and icing sugar in a food processor, process to combine. Add the butter and process again until the mixture resembles fine breadcrumbs. Put the egg yolk, water and vanilla essence in a small bowl and whisk to combine.

2. Add the egg mixture to the flour mixture and process in short bursts until both come together to make a pastry. Remove and knead gently to form a ball. Wrap in baking paper and chill for 15-20min.

3. Roll out the pastry between 2 sheets of baking paper to 4mm thick. Cut out rounds using a 5cm round cutter, and ease the rounds into muffin tins. Brush each tart with egg white and prick with a skewer. Bake for 15-20mins or till golden and crisp. Stand on a wire rack to cool.

4. Put the mascarpone, sugar and vanilla essence in a small bowl and mix to combine. Spoon mixture into cold pastry cases, top with strawberries.