Thursday, 6 October 2011

Muesli Biscuits with drizzled Dark Chocolate


I was looking for a healthy biscuit to make - and then I found these on Taste.com. They are not so healthy, but a quite addictive.


Ingredients:
- 3 cups natural muesli
- 1 cup sultanas
- 1/2 cup slivered almonds
- 3/4 cup plain flour
- 100g butter, melted, cooled
- 1/2 cup maple syrup
- 1 egg, lightly beaten
- 1/2 cup dark chocolate melts


1. Preheat oven to 180 degrees. Grease 2 large baking trays and line with baking paper.

2. Combine muesli, sultanas and almonds in a large bowl. Sift flour over muesli mixture and make a well in the centre.

3. Combine butter, syrup and egg in a jug. Pour into well and stir to combine.

4. Using 2 tablespoons of muesli mixture at a time, shape into balls. Place balls on prepared trays and flatten slightly.

5. Bake for 20min or until golden. Allow to cool on trays.

6. Meanwhile, place chocolate in a heatproof, microwave-safe bowl and microwave on high for 30 sec. Stir chocolate and repeat until smooth and runny. Using a spoon, drizzle chocolate over biscuits.


Sunday, 2 October 2011

Isabel's Singlets


On the 20th September 2011, My beautiful sister gave birth to a beautiful baby girl, Isabel Grace. I had been waiting to find out the sex of the baby before I created something for her, and had the idea of these singlets in my head for a while. I had planned to make them for some of the other little people in my life, but thought who better to make the first ones for, but my first niece...


I bought a five pack of 000 pink, white and grey singlets (as she was a tiny 5pound 11ounces when she was born, so hopefully they are the right size for summer) and visited my local Lincraft for some floral quilting material. I also pulled out a few off cuts I had from some quilts I had made. After washing everything, I took the opportunity of a labour day long weekend and got started.


I had the two flower designs planned for a while and after looking at a friends blog
(http://alittleredribbon.blogspot.com/2010/09/little-butterfly-shirt-tutorial.html) decided to do a butterfly version as well. The first thing I wanted to do was get everything ready, ironed, so once I got going, I wouldn't have to stop.


I started by drawing the shapes that I wanted, onto an iron adhesive and ironed each onto a piece of material, cutting it out ready to iron onto the singlets.


I then positioned each one and ironed them into place. I had decided that I wanted to put little sleeves on each one and had originally planned on doing them both the same, using a chiffon material, but found some lovely lace while shopping and changed one of them to have a lace trim. I pinned the lace and chiffon into place and ironed each one, to try and keep it neat for sewing. After the sleeves/trim and flowers were sewn on, I sewed some buttons in the centre of each flower to finish. I put some tiny wings on the back of the butterfly singlet. I just used some chiffon and tied a bright pink ribbon on it to bunch, and then sewed it onto the back.


Below are the finished singlets. I made three in total. They were so fun to make, that I am already starting the ones I originally planned for Christmas, as well as a boy version for my nephews birthday. 


Friday, 30 September 2011

Hazelnut Pavlovas with Nutella Cream

I had lunch today with two lovely ladies and wanted to make a dessert with a difference.
After searching taste.com.au for a little while, i found these yummy treats.


The recipe was to make one very tall pavlova, but i decide to make 2 smaller ones.


Ingredients:
- 3/4 cup finely chopped hazelnuts
- 4 egg whites
- 1 cup caster sugar
- 2 tsp cornflour
- 1 tsp white vinegar
- 300 mls thickened cream
- 1 1/2 tbls chocolate hazelnut spread
- Strawberries and flake to decorate.


1. Pre-heat oven to 180 degrees. Line an oven tray with baking paper and using a plate, trace a 15cm circle onto paper. Set aside.

2. Place hazelnuts onto a separate baking tray and bake for 5min or until golden. Remove hazelnuts from the oven. While they are still warm, wrap in a clean towel and rub vigorously to remove skins. Discard skins and finely chop hazelnuts. Set aside to cool.

3. Reduce oven to 120 degrees. Use electric beaters to beat the egg whites in a clean, dry bowl until medium peaks form.
Gradually add caster sugar, one tablespoon at a time, beating constantly until meringue is thick and glossy and sugar is dissolved. Add the cornflour and vinegar and beat until just combined.

4. Gently fold through chopped hazelnuts and spoon meringue mixture onto the baking tray, following the shape traced on the baking paper. Bake immediately for 1 hour and 50min.
(I turned the oven off 30mins early, after looking through the door and checking their progress. I think because I split the mixture in half, it obviously affected the cooking time) Turn off the oven and leave to cool completely before removing.

5. Beat the cream with the chocolate hazelnut spread until stiff peaks form. Spoon onto pavlova to serve. I sprinkled some cadbury flake onto the top and had some extra strawberries in a bowl for those that wanted them.  


Thursday, 29 September 2011

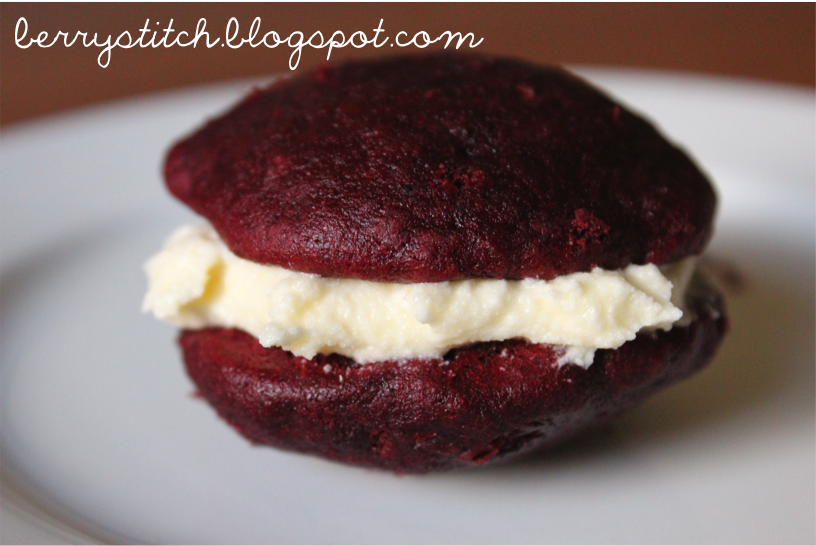
Red Velvet Whoopies

Since I am on holidays, I thought I should be a little more adventurous with my baking, so when I saw these red velvet whoopies in the October issue of Super Food Ideas - I just had to try them.
They were really easy to make, and quite delicious.


Ingredients:
- 125g butter, softened                            
- 1 3/4 cups plain flour
- 3/4 cup caster sugar                              
- 1/4 cup cocoa powder
- 1 tsp vanilla extract                                
- 1 tsp bicarbonate of soda                    
- 2 eggs                                                
- 1/4 tsp baking powder                        
- 3 tsp red colouring                              
- 1 tsp apple cider vinegar                    
- 1/2 cup buttermilk

 Cream Cheese Filling:
75g butter, softened
- 1 1/2 cups icing sugar mixture
- 1 tsp vanilla extract
- 200g cream cheese, softened

1. Preheat oven to 180 and line 4 baking trays with baking paper. Using an electric mixer, beat  butter, sugar, and vanilla until light and fluffy. Add eggs, 1 at a time, beating well after each. Add food colouring and beat until combined.  Meanwhile, sift flour, cocoa, bicarbonate of soda and baking powder into a large bowl.
2. Add half of the flour mixture to butter mixture and stir to combine. Add vinegar and half of buttermilk. Stir to combine. Repeat with the rest of the remaining flour mixture and milk until just combined.
3. Drop level teaspoons of mixture onto prepared trays., 5cm apart. allowing room for spreading. Bake one tray at a time, for 8 - 10 mins, or until puffed and cooked through.
Stand on trays for 2 mins, transfer to wire rack.
4. To make cream cheese filling, use an electric mixer, beat butter, icing sugar and vanilla together until pale and fluffy. Add cream cheese and beat until smooth and combined. Sandwich between cakes to make 2 whoopie pies.

Monday, 26 September 2011

Tiny Cupcakes

Today marks the first official day of my holidays, so I thought I would get back into my baking groove by baking some basic cupcakes.  I used the basic cake mix from the Womens Weekly cake book and divided it into some cute purple & aqua patty pans.


I then just made a basic icing mixture and put a light drizzle on each, topping with some colourful sprinkles (as I am trying to be 'good'). Even though they a simple, they sure taste good.

Monday, 8 August 2011

Mini Meringues with Crushed Raspberry Cream

Since, at the moment, my blog looks very 'berry' centred, I was thinking through other recipes which I have made this year that have used berries and found this one.
These delicate mini meringues took a while to make, and were a little bit fiddly, but melted the moment you put them into your mouth. I made them for a close friends baby shower, and due to how time consuming they were, may only make them again for another special occasion.

Sunday, 7 August 2011

Strawberry Cream Sponge Cake

I had a lovey little lady's 2nd birthday 'tea' party today, and thought that this strawberry sponge cake would be perfect.

It was very easy to make, and even though we have a horrible oven, it was moist and delicious! I used the cheats sponge cake recipe from 'Super Food Ideas' magazine, August 2011 issue, and stole the idea for the filling from a good friend. The filling contains 300mls of thickened cream, whipped, then towards the end of the whipping, I added a rather generous serve of strawberry topping. Once completed, I dusted it with icing sugar and topped with some BEAUtiful chopped strawberries